Saturday, June 30, 2012
Printmaking and Pattern in KDG.
STILL - LIFE: Printmaking Patterns and 3D
*****************************************************************************
In KDG. we have art class for 60 minutes.
I have one sink for 16 o 22 students.
This project requires 2 class periods to complete.
********************************************************************************
We discuss different types of compositions throughout the year. This is one lesson I use when discussing STILL LIFE. You can choose any artist you would like. I used Cezanne and Van Gogh.
*********************************************************************************
We also discussed printmaking and what exactly it was. I usually show them some different types of printmaking and we talk about any experiences they may have had using printmaking techniques.
First we used rounded shaped objects to print 4 or 5 flower shapes on different paper scraps. I use tempera paint, printmaking ink, or printing pads, depending on which I have at the time.
******************************************************************************
While they were drying and we were cleaning up our printmaking areas, we then took a rectangle of color (precut by the teacher) and created patterns on it (we had discussed patterns earlier in the year). The students pick from different piles of color.
The last thing we do on Day 1 is to pick out a background piece of paper, put our names on the back and make a patterned table or tablecloth.
**********************************************************************************
On day 2, we cut out our flower shapes.
We glue down the colored rectangle so it makes a 3D shape and curves out from the paper.
On the paper we add stems, leaves, etc. to our compositions. The students may add any ideas they would like to create.
*********************************************************************************
If we still have some time left, we glue our project down to a larger piece of paper to create a border. We decorate it.
Monday, May 28, 2012
From Leonardo to Pablo
In 4th grade we study Realism and Cubism.
We do self portraits using facial mapping and learn about Leonardo da Vinci.
We also study Pablo Picasso and his different periods of art.
We concentrate on Cubism and do a portrait on the internet.
After printing our portraits, we create clay relief sculptures.
Our art classes are 75 minutes long and the whole unit takes about 5 art classes to complete.
********************************************************************************
Day 1: Introduction to Leonardo da Vinci and Realism.
We discuss facial mapping and use it to compose a realistic self portrait using mirrors, pencils, markers, erasers and 2 pieces of paper(one for our drawing and the other for our facial mapping guidelines). We also use a black sharpie marker to draw our facial mapping guidelines and our pencils and erasers for our actual realistic drawing.
********************************************************************************
Day 2: Completion of Realism - Self-Portrait.
We complete all of the important parts of our face and finish all of the details on our drawings. For those who finish early, they may add colored pencil to their portraits.
********************************************************************************
Day 3: Introduction to Picasso and his Art Periods - Emphasis on Cubism.
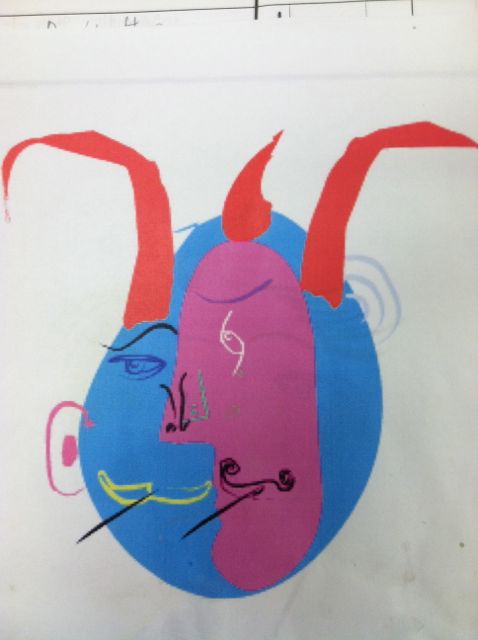
I show students a PPT. presentation on Picasso and we look at several of his Cubist portraits. We hand out laptops and go to the following website. Here we compose a Picasso Cubism portrait and print it out. Below are 2 student examples:
********************************************************************************
Day 4: Relief Sculpture - Cubism Portrait.
This class period the students learn about relief sculpture, clay, tools and procedures. Using the printed compositions from last art class, each student constructs a Cubism portrait relief sculpture from clay.
********************************************************************************
Day 5: Ornamentation of Clay Sculptures.
Once all projects have been fired in the kiln, the students are ready to add acrylic paint, glitter, wire, beads, buttons, feathers, whatever to their sculptures. I give them the option of using modpodge or another type sealant before they add the other details.
Monday, April 30, 2012
Art Show Time
I have been so busy getting ready for our 30th annual district wide art show, I totally forgot about my blog this month.
Getting ready for an art show is always a major undertaking.
We have art work from KDG. through 12th grade.
We also have a feature that shows art works and thoughts from our alumni.
Our area technical school will also be displaying their student art work.
I am excited to see what new creations will inspire me this year.
Here are a few of the pieces I really liked this year.
Saturday, March 31, 2012
Henri Matisse 1869 -1954
This art lesson is based on Henri Matisse and I taught it to my Kindergarten classes to review color and shape.
Henri Matisse was born in France and lived to the age of 84.
He began studying law but once he was introduced to painting, he decided to become an artist.

He did many different types of art – drawing, printmaking, collage, sculpture and painting.
Many of his pieces emphasize color and shapes.
He liked creating patterns too.
During the last 14 years of his life, he was sick and could not paint anymore.
This did not stop him from still creating art.
He began to use scissors and make cut outs that he glued together.
This is considered his cut out or collage period.
Today his paper cutouts are in museums all over the world.

After looking at some of his work and discussing colors and shapes, I showed my student a Lego movie by Yellowhead Productions about Daedalus and Icarus.
Then we looked at Matisse’s Icarus and talked about what each shape and color represents.
I passed out paper, glue, scissors, and pencils.
I asked my students to create Icarus like Matisse.

First we put our names on the back of our papers and then drew our Icarus on black paper.
We talked about his arms and legs and in what position they might be posed considering the story.
Then I left them decide what other shapes and colors to cut out and add.
Here are some examples from my students.

If any students got finished early, I suggested they make some cutouts of their own just like Matisse.
Many of my students made up their own endings to the story of Daedalus and Icarus.
This student wanted Icarus to land in the ocean and be rescued. Although he never saw his father again, he survived.
Wednesday, February 1, 2012
David Armstrong - 1947 to 1998

Painting a Winter Landscape Composition
I was very fortunate to have David Armstrong as my watercolor teacher. When he was attending Bucknell University, he taught some graduate courses for the Pennsylvania State University.

David was born in 1947. He lived in Kent, Connecticut on his family’s sheep farm. He studied at the Taft School, Bucknell University and Indiana University.

He spent most of his life in Unityville, PA on his farm. He painted realistic watercolors of everyday life and the beauty of the American landscape. He always painted the mood of the moment on location, not from photographs.

I love watercolor painting and always want to share what I know with my students. I taught this lesson in 1st grade and 5th grade. I introduce the class to the watercolor paintings of David Armstrong. Because Bucknell University is in our hometown, the children relate to it.

We discuss landscape painting, winter, foreground, middleground, background and sky. We also discuss perspective and the horizon line.
We discuss winter and I explain that we are going to paint a winter landscape that demonstrates all of the above and some different watercolor techniques.
Once we all have paint shirts on, tools and materials ready and our names on the back of the paper, we begin.
First technique is masking: We discuss what masking does and then take masking tape and put in the horizon line (one strip across our white drawing or watercolor paper). Then we take three pieces of tape and run them from the top of the paper and down crossing the horizon line. These will be trees. Next we tear pieces of tape to make branches and twigs on our trees.

The second technique we discuss and do is resist. You can use crayons or oil pastels. We used crayons and colored in the moon – the choice is up to each individual student - full, crescent, rising setting, white, yellow, etc.
Our third technique is wet on wet. We are ready to paint the sky. We talk about winter skies and then wet the top part of the paper (the bottom will stay white as it is the snow on the ground) with water and add blues, purples, whatever the students think they want their skies to look like.
Our fourth technique is to take the plastic or wooden end of our paintbrush and scratch some trees right above our horizon line. Because the paper is wet the color goes to those scratches. We are creating distance and adding details to our landscapes.
The final technique is using salt to create an interesting texture on the sky. While the sky is still wet we drop some table salt onto it. Pretzel salt makes a different technique than table salt. We review the five watercolor techniques we used and put our projects on the drying rack until next time.
Second art class: Review and hand back landscapes. We are again decked out in our paint shirts and have deskcovers on the tables. Our first step is to very carefully remove the masking tape from our papers. The horizon line should be the last to be removed. (If anyone tears his or her paper, you can usually tape the back or glue a piece of white to the back where the hole may be.)
We talk about hard lines and soft lines. I show them black charcoal and some pictures of white birch trees. I show them how to use the charcoal and blend it –we used pieces of paper towels and erasers for this part. We discuss the textures we see on the trees. I ask them to turn their trees into birch trees making sure the tree bottoms come down past our horizon lines. This will give us some distance in our landscapes. We discuss these are the trees in the middleground of our landscapes.

When they are finished we discuss the moon and how it might create some shadows from the trees on the snow. We add the shadows on the snow next. We also discuss how to make distance in our landscapes and then we put some objects in our background – again it is up to the individual whether he or she adds more trees, buildings, mountains, hills, people or animals. We also discuss what might be in the foreground – animal, people or vehicle tracks, snowmen, fences, buildings, etc. and then we add them.
We review all of the parts of our landscapes using our vocabulary words. We wash the charcoal off of ourselves and erase any marks on our papers we don’t want there.
Our last part of this project is to create a snowfall on our landscapes. We discuss the sixth and final watercolor technique of spattering. I demonstrate both methods – using a paintbrush and tapping it or using a toothbrush and a piece of cardboard. By running the toothbrush over the edge of the cardboard, it also will create spatters. We use white tempera for this because the white watercolor paint does not show up as well. Remind them that the spatters should go on the landscape not on themselves or their neighbors.
Clean up, collection and closure are last. Below are some finished results.
The first three are from Grade 1 and the last three are from Grade 5.


If you want to learn more about David Armstrong and see some of his other work just click on watercolors.
Sunday, January 1, 2012
Pop Art
You know I have done quite a few entries on POP ART and my 5th graders will be starting POP ART when we begin art in 2012. I like to do a different POP ART project in each class so we have a variety for the school to view. This presentation is a great introduction.
Pop Art
View more presentations from educ5254
Thursday, December 29, 2011
Henri Matisse

The artist I have chosen for this December is Henri Matisse.
His full name was Henri Emile Benoît Matisse. He was born on December 31st, 1869 in the town of Le Cateau-Cambrésis in northern France.
He went to Paris to study law in 1887.
When Matisse suffered appendicitis in 1889, his mother bought him some art supplies. He was hooked on art. His father was not happy that Matisse gave up practicing law to become an artist.

In 1891 he moved to Paris to study art.
Matisse’s paintings were expressive and really emphasized colors and shapes. He is associated with Fauvism.
Matisse made paintings, prints, sculptures, drawings, and collages.

In the 1940's Matisse suffered major health issues and began to “paint with scissors.”
He created large cut paper collages. He called this new technique "painting with scissors."
These cut paper collages continued to use bright colors and shapes.

He died at the age of 84 in 1954.

If you are interested in learning about Matisse and his art, please click on the link from the Baltimore Museum of Art at the bottom of this information (Click on the artist's name).
You will need Flash on your computer to run this interactive bio.
It is a lot of fun and you will meet a dog who will help you understand what to do.
Henri Matisse
Subscribe to:
Posts (Atom)